Wednesday, February 19, 2014

Challenge number 6....lumber and wood

Not gonna lie friends...I'm in Hawaii. But in an amazing feat of motivation I actually made something ahead of time and had time to blog about it. What?! I know pretty dang amazing. What else will be amazing is that this blog post won't get deleted if Nathania posts as well. Blogger doesn't like us sometimes and Nathania's computer has been known a time or two to erase entire posts...

But enough about the dysfunction of computers and blogger....

Onto the project. This week we challenged you to use lumber and wood. So I went out and picked up sticks. We had a huge wind storm that came through so I just went out on the ski trails and picked up some sticks. Good for my project and helps the skiers out too!

I'm pretty sure that all the sticks were birch...but I'm not known for my stick identification skills.
I brought them home...well they sat in the back of my car for a while, were chewed on by a fluffy black dog, and then finally brought in when I was motivated enough to actually do the project!

I had this great circle frame that I had taken off of a clock that no longer worked, grabbed some yarn and gorilla glue.
I put some glue on the frame and then some sticks and then clamped it down with the yarn. I the progressively worked my way around, with all of the sticks going in one direction.

Now I've never used gorilla glue before, and I only used it because I ran out of hot glue sticks. It was not my finest moment. Like Nathania on her project last week, the gorilla glue expanded and then looked weird. So I have some weird spots that need to be covered up with some more sticks...or a flower or something....I can't decide.

In spite of the gorilla glue looking weird in some spots, I really do like the outcome. Where it will go in the house is yet to be determined.

What did you do for your challenge this week?

Sarah


Friday, February 14, 2014

Chopped!

This past Saturday, Andy and I hosted a "Chopped" party. What is a chopped party you say? Well its a party in the theme of the fun "Chopped" show on the Food Network.

When we sent out the invitation for the party, we gave a list of ingredients that the attendees needed to make up a dish with.  Our list was : Spinach, Basil, Citrus, Salmon, Goat Cheese, Siracha, Chocolate
The dishes that were made needed to include at lease 4 of the ingredients.

We had 5 dishes, and surprisingly enough nobody brought anything similar. We had each couple "plate" their items, because you know presentation is part of the judging criteria. Then we dug in.

Our first dish was a crustless quiche that Nathania made. It included goat cheese, spinach, siracha, and basil. It was accompanied by toast and a butter that included basil and siracha.

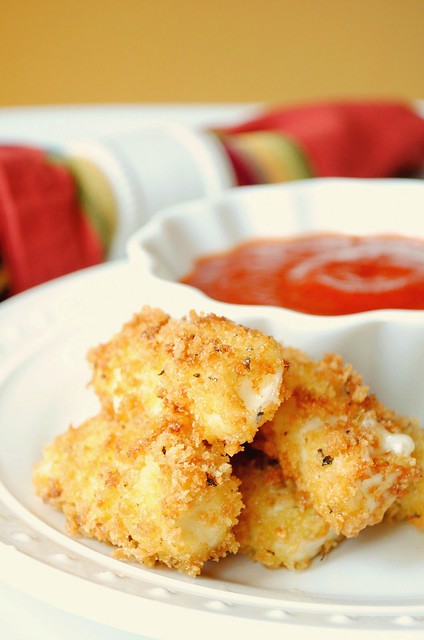
This was our only Salmon dish of the night. It was a quinoa cake that included siracha. The cake was topped by goat cheese with cracked black pepper, salmon marinated in lemon, and a lemon wedge.  It had a good kick, but was oh so good.

A tasty pesto was also part of the evening. It included spinach, basil, lemon and was topped by some crumbled goat cheese. It also had some sundried tomatoes and garlic. It was yummy.

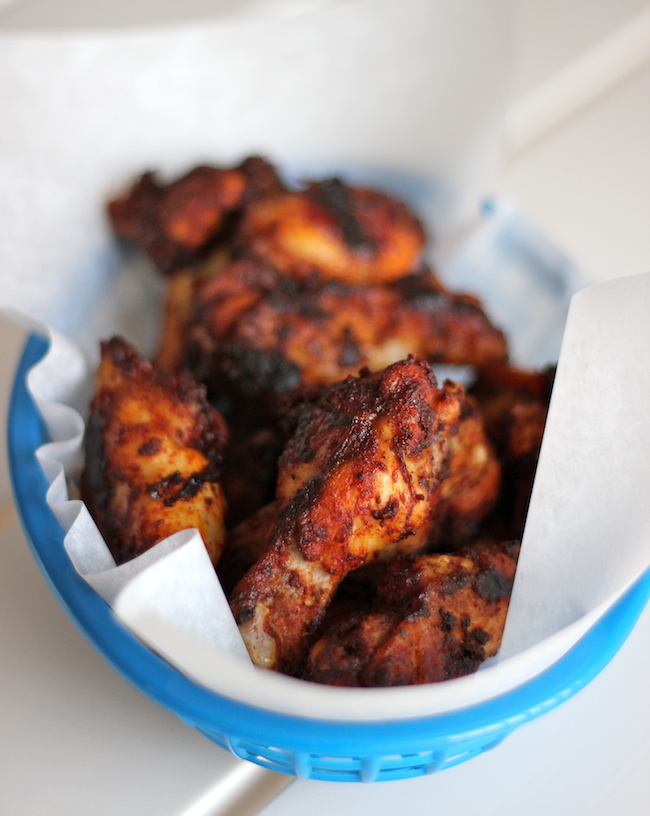
The most involved dish award goes to our friends Carissa and Kevin, who brought a chicken dish that was served over a bed of rice, with warm spinach and goat cheese. They also had lemon and basil in the dish. Carissa even went the extra mile and brought her own presentation plates!

Our contribution to the night was a dessert. I made a crusty cookie wafer thing with chocolate, butter, graham cracker crumbs, and some chopped pecans. I added some sugar and lemon to a marscapone and goat cheese layer to make it sweet, and then I topped it with raspberries and some fresh cut basil. It was tasty.

Now, I'm sure you're all dying to know who won right?

We decided to have two winners. First the Chopped champion, determined by Andy and I, and then a peoples choice award, in which everyone voted.

Our peoples choice award was given to....

Carissa and Kevin with the Rice and Chicken dish.

And our overall Chopped Champion went to Krista and Kevin with the Salmon Quinoa Cakes.

Apparently to win you have to have a significant other whose name is Kevin...

The party was super fun, and a silly excuse to get together with some friends.

What did you do this weekend?
 
Sarah


Wednesday, February 12, 2014

Challenge # 5 - finishing things up...finally

This weeks challenge:
Project Finish: Look at the pile of stuff you've attempted to make and then gave up...or is that just me who starts a ton of projects, but hates finishing them? You've bought the materials and I'm guessing the project is over half done. So the challenge this week is to actually finish it. You can thank me later.

Love this challenge as I have many, many (too many according to my husband) unfinished projects scattered around the house. The embarrassing thing is that a lot of them only take minutes to finish.  Like this one I found tucked away in the closet...it took me all of 3 minutes to finish, pathetic I know!! 

                                     But, now it's finished and just in time for Valentine's Day!!!


I forgot to take an unfinished pic of this next project but once again it took only about 15mins to finish.  It was missing 4 corks...yes I said 4 but I also had to take corks off. Why you ask?  Well because I used gorilla glue for the first time to attach them when I couldn't find my hot glue gun and I may have been a tad over zealous with the glue because as we all know more glue is better, right? 

 Not so with gorilla glue, less is definitely more as it puffs up when it dries and my poor corks got pushed all out of place :(!  Ok, it may have been millimeters that they were pushed out of place but it was enough to displease my annal nature AND I could see the offending gorilla glue puffing up around the corks, not cool. So, corks came off, I cut off the offending gorilla glue and glued them back on with my beloved hot glue gun!!!


I got the idea off of Pinterest but switched it up a bit my alternating the direction of the corks instead of gluing them down all horizontily. Not sure where it will end up, maybe in my new craft corner to hang up


What project did you finish?
Nathania

Next weeks challenge:

Lumber, sticks, wood: Make something out of a tree. Play with some stain. Go get some free pallets and finally make one of the hundred pallet projects you've pinned. Go to the forest and find some sticks...if the snow has melted...make something pretty.

Linked to Frugally Sustainable

Tuesday, February 11, 2014

A little Valentine Day love

I love to do crafts with my daughter and in honor of Valentines Day I decided we needed to make a new bunting for over our fireplace.  I dug through my stash and collected my supplies - paint, cardboard, scissors, paint brushes, foam and a burlap bag and set to work.  I made 4 cardboard stencils - 2 hearts and 2 x's and 8 burlap squares.   I taped Aria's burlap to the stencil so it wouldn't move and she had a blast mixing red and white while painting her hearts.

 I love how serious she gets when she paints!!
 She managed 2 hearts and 1 X before loosing interest but for a 3yr old I thought that was pretty good!  I was going to hot glue or sew them onto bias tape or thick twine but after I hung them up to dry with clothes pins on some thin twine that was already hanging on the fireplace I decided they looked good just like that!


 Aria and I also made some sticker Valentines to hand out using Life in the Green House 's tutorial and free pdf. I liked making non-candy Valentines to hand out and Aria had fun picking out all the stickers, deciding which ones to put in the bags for her friends and stapling them all shut!! 


Have a wonderful Valentine's Day!!
Nathania

Thursday, February 6, 2014

Anyone else accepting the challenge?

These ladies are!
 
For our first challenge, our Mom decided to join us. Her creation of a purple robe, could have been used for both the first and second challenges.
 
If you wanna see more details about how she made the robe go and check it out here!
 
We don't blame her for not doing the last couple challenges as she was enjoying the warmer weather of Phoenix...but hopefully she will join us on our next couple of challenges!
 
 
The lady who takes the cake though is Jeni from Life on Our Side of the Street. She has been with us, meeting every challenge we have posted!
 
Challenge # 1--Cute little apron for her kitchen helper:)
 
Check out this sweet ammo case she has in her bathroom...if you could see my face it would be an envious one:)
 
My favorite project she's done...check out her cute Anthropologie inspired sweater re-make!
 
It's cold where Jeni lives...legit challenge for her snowy winter wonderland last week...also this was one of three projects she made!
 
 
Way to go ladies! We love see what you've come up with.
Our complete Challenge 2014 can be seen here:
 
Week 1--DeStash the Stash
Week 2--Bathroom
 
 
So now the real question is....
 
 
Who is going join us?
 
This next weeks challenge is: 
 
Project Finish: Look at the pile of stuff you've attempted to make and then gave up...or is that just me who starts a ton of projects, but hates finishing them? You've bought the materials and I'm guessing the project is over half done. So the challenge this week is to actually finish it. You can thank me later.
 
Sarah

Wednesday, February 5, 2014

Challenge #4 winter wonderland

This weeks challenge was to make something for winter. We love winter around these parts but have seriously been lacking the snow. Even Lucy thinks so.
(cute puppy that has nothing to do with this post except that she loves winter)

For this weeks challenge, I got my creative juices running and I made some easy peasy fingerless gloves. I often get cold hands but still need to be able to use my phone...so these are great. Plus I think they're cute.
Now they took a long time to make. I was slaving over them. Ha! Yeah right. It took 5 minutes.
Now it may take you a bi longer if you don't have a plethora of felted sweaters like I do, but only the length of time it will take to wash and dry the sweater.
So what I did he was cut the sleeves off at equal lengths and then cut wholes for the thumb. I then tucked the top in and sewed them down by hand.

Easy right? I thought so and was pleased with the results. What did you make?
Sarah

Next Weeks Challenge
Project Finish: Look at the pile of stuff you've attempted to make and then gave up...or is that just me who starts a ton of projects, but hates finishing them? You've bought the materials and I'm guessing the project is over half done. So the challenge this week is to actually finish it. You can thank me later.
You can check out all of the challenges here.

Linked up to Frugally Sustainable

Tuesday, February 4, 2014

Spool Bunting

As anybody who sews knows, there is always going to be scraps and such left over. There will also be spools. Lovely, quirky shaped spools that if you're a hoarder frugal person like me, you have to do something with. What's a girl to do? Make a cute little bunting to go in her nieces new big girl room.

This is a project with an easiness score of:
Even you people who claim to not be crafty...you can do this and it will turn out pintrest worthy.

Don't believe me? Try it and then tell me I'm wrong.

First things first, what do you need?
Spools--either hoarded or from the craft store...pretty sure they sell them there.
Fabric scraps--coordinating, matchy-matchy or just whatever you feel like. (Yarn could work too!)
Yarn/twine
Buttons--with big enough holes for the yarn to go through
Something sticky--double stick tape/hot glue/scotch tape


The process is simple:
-Get out the spools and measure them. If they are all the same you only need to measure one, otherwise you'll have to measure each one.
-Cut out fabric strips that are long enough to go all the way around each spool and overlap a bit
-Glue/tape the fabric strips on to the spools. I usually use two pieces--one for attaching the strip to the spool and the another to secure the other end.

-Next cut out the yarn--make it a little longer than you want the finished project to be
make longer=difficult vs. cut shorter=easy
-I start by putting a spool in the middle and then lacing a button on either side of the spool. After in the right place, I put a knot on the outside of each of the buttons. This keeps the spools in one place without going up and down the yarn.
-Move outward on the yarn in different increments according to preference.
I used up all the spools I have and voila--a spool bunting!

Questions? Let me know and I'll try to explain it better.


I hung it up with another bunting I had made on the stairway banister. This could be hung up as a window decoration, mantel decoration,


The other coincidence is that this could be a Valentines day bunting. Make them in ever color to go with the other holidays....the possibilities are endless! Make one for your sewing friends as a gift, decorate your own crafty space.

I would love to see if you try it!
Sarah

Monday, February 3, 2014

Pinterest Eats

I don't  know about you but I love a chance to try out new recipes.  It doesn't have to be a special occasion but it doesn't hurt either! Super Bowl Sunday was an ideal day to grab some recipes off my Pinterest board and temp my palate with new flavors!

I decided to try three new ones.

 Homemade Mozzarella Sticks
                           Homemade Mozzarella Sticks
                              (image - Howto-Simplify.com)

Baked Brown Sugar Chicken Wings with Roasted Red Pepper Cream Sauce - Amazingly crisp, baked wings served with a creamy dipping sauce!
                                                     Baked Brown Sugar Chicken Wings
                                                          (image - Damndelicious.net)

 
                                                                Mini Peach Cobblers
                                                             (image- alli-n-son.com)

 Not the healthiest picks but as my husband said, "it's the Super Bowl, I don't want anything healthy". 

Surprisingly they all turned out super tasty and they were easy to make!! I say surprisingly because my latest Pinterest recipe attempts have been lacking in the flavor department! I would make all three of these again and really would only change the sauce of the wings as it was a little too goat cheesy for my palate and I wouldn't double the sauce when doubling the wing recipe as I had a lot left over!

I didn't take any of my own pictures as I was making them whilst the Super Bowl was happening so a) I didn't have time, b)people were hungry and lets be honest, c)I need to work on my food picture taking skills!  

I hope you enjoy these recipes as much as I did!

Nathania
Related Posts Plugin for WordPress, Blogger...